 904
904
AdminMenu - Adding Custom Chat & Console Commands
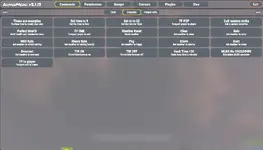
AdminMenu allows you to create your own buttons that execute chat commands, console commands, or plugin commands without modifying the plugin itself. Simply edit the configuration file and reload the plugin.Editing the Configuration
Open:oxide/config/AdminMenu.jsonThere are three sections you can customize:
- Chat Command List – Creates buttons that execute chat commands.
- Console Command List – Creates buttons that execute console commands.
- Player Info Custom Commands – Adds buttons to the Player Information window for actions targeting a selected player.
o.reload AdminMenuChat Command List
Every chat command follows this format:
Code:
{
  "Name": "Button Name",
  "Command": "/command",
  "Description": "Description shown in the menu",
  "CloseOnRun": false,
  "RequiredPermission": ""
}Fields
| Field | Description |
|---|---|
| Name | Text displayed on the button. |
| Command | The chat command to execute. Must include the /. |
| Description | Tooltip displayed when hovering over the button. |
| CloseOnRun | Closes the menu after executing the command. |
| RequiredPermission | Optional permission required to display the button. Leave empty to always show it. |
Example - God Mode
Code:
{
  "Name": "God",
  "Command": "/god",
  "Description": "Toggle god mode",
  "CloseOnRun": false,
  "RequiredPermission": ""
}
Example - Teleport Yourself to a Player
Code:
{
  "Name": "TP to Player",
  "Command": "/tp {target1_name}",
  "Description": "Teleport yourself to a player",
  "CloseOnRun": false,
  "RequiredPermission": ""
}
Example - Teleport Player to Player (Two Targets)
Some commands require selecting two players.Use:
Code:
{
  "Name": "TP P2P",
  "Command": "/tp {target1_name} {target2_name}",
  "Description": "Teleport player to player",
  "CloseOnRun": false,
  "RequiredPermission": ""
}Console Command List
Console commands work exactly the same way except they execute as server console commands.Every console command follows this format:
Code:
{
  "Name": "Button Name",
  "Command": "console.command",
  "Description": "Description shown in the menu",
  "CloseOnRun": false,
  "RequiredPermission": ""
}
Example - Set Time
Code:
{
  "Name": "Set Time to 9",
  "Command": "env.time 9",
  "Description": "Set the time to 9 AM",
  "CloseOnRun": false,
  "RequiredPermission": ""
}
Example - Clear Weather
Code:
{
  "Name": "Clear",
  "Command": "weather.load clear",
  "Description": "Set weather to clear",
  "CloseOnRun": false,
  "RequiredPermission": ""
}
Example - Teleport Yourself to a Player
Code:
{
  "Name": "TP to Player",
  "Command": "teleport {target1_name}",
  "Description": "Teleport yourself to a player",
  "CloseOnRun": false,
  "RequiredPermission": ""
}
Example - Teleport Player to You
Code:
{
  "Name": "TP 2ME",
  "Command": "teleport2me {target1_name}",
  "Description": "Teleport player to yourself",
  "CloseOnRun": false,
  "RequiredPermission": ""
}
Example - Teleport Player to Player (Two Targets)
Commands that require two players use two placeholders:
Code:
{
  "Name": "TP P2P",
  "Command": "teleport.topos {target1_name} {target2_name}",
  "Description": "Teleport player to player",
  "CloseOnRun": false,
  "RequiredPermission": ""
}Player Info Custom Commands
This section adds custom buttons to the Player Information window.Unlike the Chat Command List or Console Command List, these commands are designed to work with the currently selected player.
Each entry groups one or more commands together.
Example:
Code:
{
  "Name": "Freeze",
  "Commands": [
    {
      "RequiredPlugin": "Freeze",
      "Command Type ( Chat, Console )": "Chat",
      "Name": "Freeze",
      "Command": "/freeze {target1_id}",
      "Description": null,
      "CloseOnRun": false,
      "RequiredPermission": "freeze.use"
    },
    {
      "RequiredPlugin": "Freeze",
      "Command Type ( Chat, Console )": "Chat",
      "Name": "Unfreeze",
      "Command": "/unfreeze {target1_id}",
      "Description": null,
      "CloseOnRun": false,
      "RequiredPermission": "freeze.use"
    }
  ]
}Available Placeholders
AdminMenu replaces placeholders with the selected player(s) before executing the command.| Placeholder | Description |
{target1_name} | First selected player's name |
{target2_name} | Second selected player's name |
{target1_id} | First selected player's SteamID64 |
{target2_id} | Second selected player's SteamID64 |
CloseOnRun
"CloseOnRun": trueThe menu closes immediately after executing the command.
"CloseOnRun": falseThe menu remains open, allowing multiple commands to be executed without reopening AdminMenu.
RequiredPermission
Buttons can optionally require a permission before they are displayed.Example:
"RequiredPermission": "backpacks.admin"Leave the field empty to make the button available to anyone with access to AdminMenu.
"RequiredPermission": ""Permissions
AdminMenu uses Oxide/uMod permissions to control who can access the menu.Grant the permission to a specific player:
oxide.grant user PLAYERNAME adminmenu.allowed
Example:
oxide.grant user Wulf adminmenu.allowed
Grant the permission to an Oxide group:
oxide.grant group default adminmenu.allowed
Example:
oxide.grant group admin adminmenu.allowed
Replace default or admin with the desired Oxide group.
If you are using custom permissions on individual buttons (via the RequiredPermission field), make sure players are also granted those permissions; otherwise, the button will not be displayed even if they can open AdminMenu.
Opening AdminMenu In-Game
Once the <span>adminmenu.allowed permission has been granted, players can open AdminMenu using the configured chat command.By default:
/admin
If you've changed the chat command in the plugin configuration, use the custom command instead.
You can also bind the command to a key for quicker access.
Example:
bind f2 chat.say /admin
Pressing F2 will now open AdminMenu instantly.
First-Time Setup
- Copy AdminMenu.cs to the oxide/plugins/ folder.
- Start the server or load the plugin:
- Grant yourself the required permission:
- Join the server and type:
- Verify the menu opens correctly.
- Customize your buttons by editing oxide/config/AdminMenu.json.
- Reload the plugin after making configuration changes:
Tips
- Always validate your JSON after editing the configuration.
- Every button must be separated by a comma except the last item in the list.
- Chat commands must begin with
/. - Console commands should not begin with
/. - Two-player commands automatically prompt you to select both players.
- Changes take effect after saving the configuration and reloading the plugin with
o.reload AdminMenu.